A few years after I received the quilt from my mother-in-law, I decided that I wanted to make a quilt for my niece as a high school graduation gift.
I had made her a fleece blanket when she was a baby. I made her a larger one with her name appliqued on it as a gift for her first birthday. I made blankets for her baby dolls. It seemed only fitting that I make a blanket to go with her into the next stage of her life.
I knew she would be going away to college. I also knew, from personal experience, that no matter how excited an individual is about that particular event, there are times when you just miss HOME. I wanted her to have something cozy and personal to take with her.
I knew where the quilt shop was that my mother-in-law used, Hunter’s Quiltmart in Centerview, MO. I looked it up online and decided that a kit was the best way to go at this point. This wasn’t my first foray into quilting (I made 2 quilt blocks in 2003 – more on that later), but picking out a pattern and fabric seemed too overwhelming. So, off I went to the quilt shop.
I purchased a kit. I already owned a quilting ruler, rotary cutter and cutting mat. I do not recall asking questions about piecing a quilt top while I was at the store, but maybe I should have. Thankfully, I made it through piecing my first completed quilt top without any MAJOR mishaps. Sure, there were a couple seams that got ripped out when something wasn’t sewn exactly right, but when considering this was my first completed quilt top, those were minimal. The main thing that I should have researched, but didn’t, turned out fine.
From my previous experience sewing clothing, I knew pressing seams impacted the final product. In my experience with clothing, the patterns generally specified which direction to press seams. The quilt pattern in my kit did not specify which direction to press the seams. It did state that it assumed a knowledge of piecing, quit top assembly, etc. I did not think to “Google” which way to press the seams. I just pressed them all open and continued on with my assembly.
A some point during the quilt top assembly, I started watching quilting videos and reading quilting blogs. This is when I became aware that there are definite opinions about the pressing of seams. However, I was too far along in my piecing of the quilt top, and I thought it was probably best to remain consistent throughout the entire top.
When I took my completed top back to Hunter’s to have it quilted I was a little nervous. The amazing staff there walked me through the entire process. They explained my thread options, batting options, and my options for the backing fabric. I explained that I had pressed my seams open and asked if that would be a problem. I was assured that it would not be a problem.
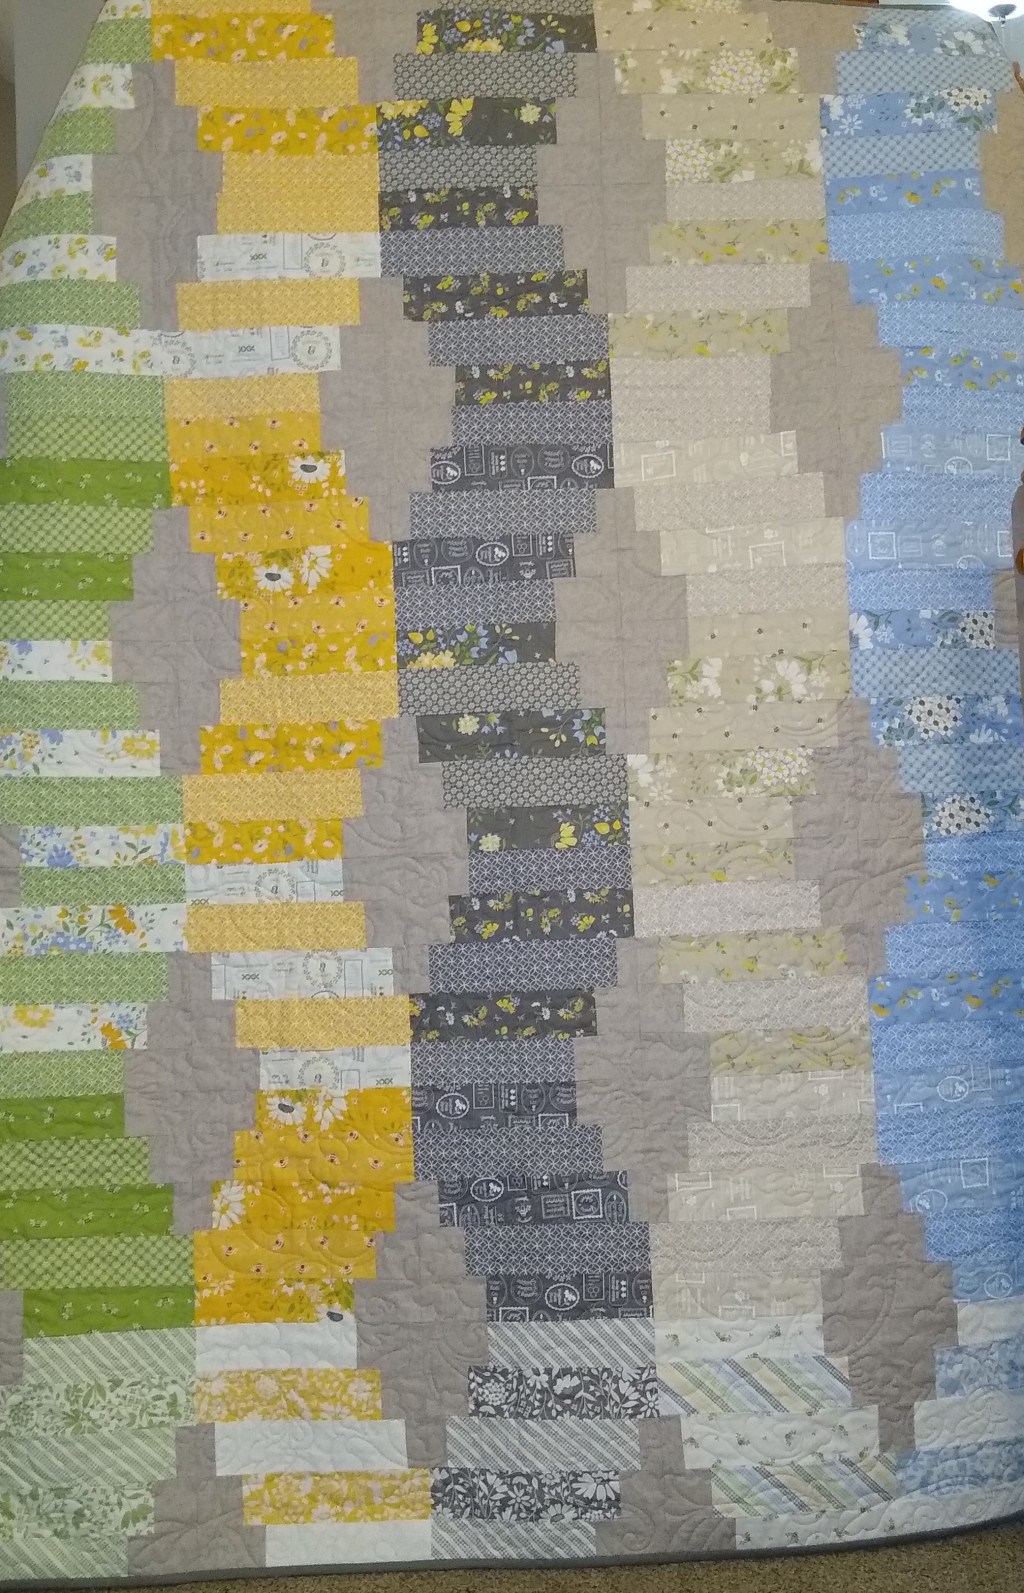
The quilt top was cute, colorful, and homey looking. I wanted the back to have a sophisticated look so she could display either side. I chose a dark gray cuddle fabric and I chose a pattern that mimicked one of the prints used in the quilt top. The staff members at Hunter’s were all so helpful and encouraging all the way through my first project. I was pleased with how it tuned out and my niece loved it.
The pattern included in my kit was “Jelly Roll Waves” designed by Myra Barnes. There is a good possibility that somewhere along my quilting journey, I will make another quilt from this pattern. It gives information for multiple quilt sizes and multiple layout options, aw well as instructions for strip piecing.
If you are a quilter, I’d love to hear what got you started and how your first project went.


You must be logged in to post a comment.